 |
|
| Making DOOM 3 Mods : Bump Maps | |
 |
|
 |
|
|
|
Most of this was taken from a document written by John Carmack some time ago,
it was so good I decided to just copy it in here verbatim -- Brian
Bump Mapping in DOOM
Virtually all geometric surface detail should be represented in bump maps instead of drawn into the diffuse maps in the conventional style. This allows a single texture to take on different characteristics based on itís interaction with lights. Two types of images can be used for bump mapping: height maps and normal maps. A height map is a gray scale image, with black being the farthest distance away and white being the closest. An addition scale parameter is required when using height maps to determine how deep the image is supposed to be. You canít properly cut and paste image fragments between height maps with different scale values without distorting the shading. You can add, subtract, airbrush, or smooth gray values by hand on a height map with predictable results.
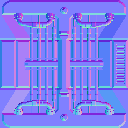
 A local normal map encodes the actual perturbation angle of the surface at each point in the RGB color, so it is complete by itself without any scaling parameters. You can cut and paste between any normal maps without problems, but you canít reasonably modify the angles of normal map surfaces by hand, or create one from scratch. Smoothing a normal map works reasonably well in practice, although it does result in denormalized pixel values. The normal vector is encoded as ( ( R-128 ) / 128, ( G-128 ) / 128, ( B-128 ) / 128 ), so a normal pointing straight up ( 0, 0, 1 ) would be encoded as ( 128, 128, 255 ) in the image. Most local normal maps will be primarily bluish, because most of the vectors will be pointing up more strongly than any other direction.
 Renderbump is also capable of generating "global normal maps", which encode an absolute direction in object space, instead of in local surface space, but global maps cannot be deformed or used on different wall orientations in the same object. They have some minor quality and performance benefits, so we might wind up using them for some static objects later, but the support has been disabled for a while. Height maps must be converted to normal maps at load time, so it is usually superior to use normal maps unless you need to manually create or manipulate the image in a way that is easier with height maps. You canít make a perfectly smooth slope in a height map because of the limited precision in the gray scale image. This results in shaded streaks along the slope, especially with higher resolution height maps. You may be able to hide that by adding some waviness to the surface manually. Using Bump Maps
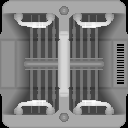
Every surface that interacts with light will have a normal map.If one isnít specified, it will default to "_flat", an internally generated normal map with no changes. There is currently no speed benefit to not having a normal map, although it might be possible to add a fast path for that in the future. Most materials can be specified in the "shortcut" form, where you specify the diffusemap, specularmap, and bumpmap, and let the engine generate the full stages for it. textures/doom/techpanel
{
qer_editorimage ase/techpanel.tga
diffusemap ase/techpanel_diffuse.tga
specularmap ase/techpanel_specular.tga
bumpmap ase/techpanel_local.tga
}
If diffusemap is nor specified, it defaults to a solid white image. If specularmap is not specified, specular lighting will be disabled for that surface, giving a speedup. If you need to perform any shader system operations, like animation or scrolling, you will have to write the stages out separately: "Testbump <image name>" Uses the specified normal map on every surface in the world. If you want to test a heightmap, you must use an image program and scale factor to convert it to a normal map: "TestBump heightmap( bumpmaps/squiggle.tga, 4 )" You can modify the lighting calculations to examine the bump mapping under different conditions:
"r_skipSpecular <0 or 1>" Renderbump
The renderbump tools generate normal maps directly from detailed polygonal geometry. The high poly count models will be tens of thousands to hundreds of thousands of triangles, while the geometry that will use the normal maps can be either simple flat brush sides, or game character level geometry of around two thousand triangles. The alpha channel of the normal map will contain a mask if there were areas in the map that did not directly map to geometry. This can be copied to a diffuse map to use with the alpha test option for per-pixel opacity. Note that if you use the normal map as a template for the specular map, you should explicitly clear or remove the alpha channel, because it will prevent more efficient compression forms from being used. The generated image will be saved to the game basepath. There are two forms, both integrated in the main DOOM executable. Flat RenderBump
RenderBumpFlat [-size <width> <height>] <modelfile> Size defaults to 256 by 256 if not specified. This version generates normal maps suitable for mapping on surfaces like standard textures. The modelfile should hold a set of triangles that make a generally 2D surface in the XZ plane, with the front side facing down negative Z. The modelFile does not need to have texture coordinates, but you should save it with normals if you donít want the entire thing smooth shaded. The generated normal map will be saved to "<modelFile>_local.tga". RenderBumpFlat uses the graphics accelerator to draw the normal maps, which makes it very fast, but imposes a couple restrictions. You cannot create an image of higher resolution than the screen, and you shouldnít drag another window over the working window while it is rendering. RenderBumpFlat automatically performs 16x oversampling, so the resulting image should be sufficiently anti-aliased. General RenderBump
renderBump <lowPolyModel>The renderbump command is used to generate a normal map for a non-flat surface like the surface of a character model in the game. The parameters for renderbump are specified in the materials applied to the surfaces of the low detail model
renderBump [-size <width> <height>] [-aa <0/1/2>] Size defaults to 256 by 256 if not specified. AA defaults to 1 if not specified. Trace defaults to 0.05 if not specified. The AA setting determines how much anti-aliasing will be done. The default level of one gives 4x anti-aliasing, while level 2 gives 16x and level 0 gives 1x. The trace setting determines how far off of the low poly surface that a ray cast will look for triangles in the high poly surface. It is expressed in fractions of the largest bounding axis. Tracing speed goes down rapidly as this is increased, but if your high poly geometry isnít showing up in the normal map, you may need to increase this to 0.1 or more. The best solution is to try very hard to have the low poly version be a very close match to the high poly version.
The lowPolyModel must have texture coordinates on it, and care should be taken to make
sure the mapping is as good as possible. Before doing a RenderBump, test the model in
the game with "r_showTexturePolarity 1" and "r_showEdges 1". Make sure that there arenít any
texture seams that arenít absolutely necessary, and that there are no overlapped texture projections.
|
 |
|
| Copyright © 2004 id software |