Creating a Specular Map for Quake 4
This document will attempt to explain how to do a specular map for Quake4. This how-to can be used for both textures and skins. I took a section of both the local and diffuse maps of one of our Terminal textures and did a quickie specular map for it. I took screenshots and have included them with a short explanation. This demonstration was done after assuming the diffuse map has already been done.
Step 1: Open Photoshop and then open your texture’s local and diffuse maps. Make a copy of your Local map, Grayscale it, Invert it, and then switch it back to RGB Color. Slide or copy over your grayscaled/inverted local map copy onto a new layer over your texture’s diffuse map.
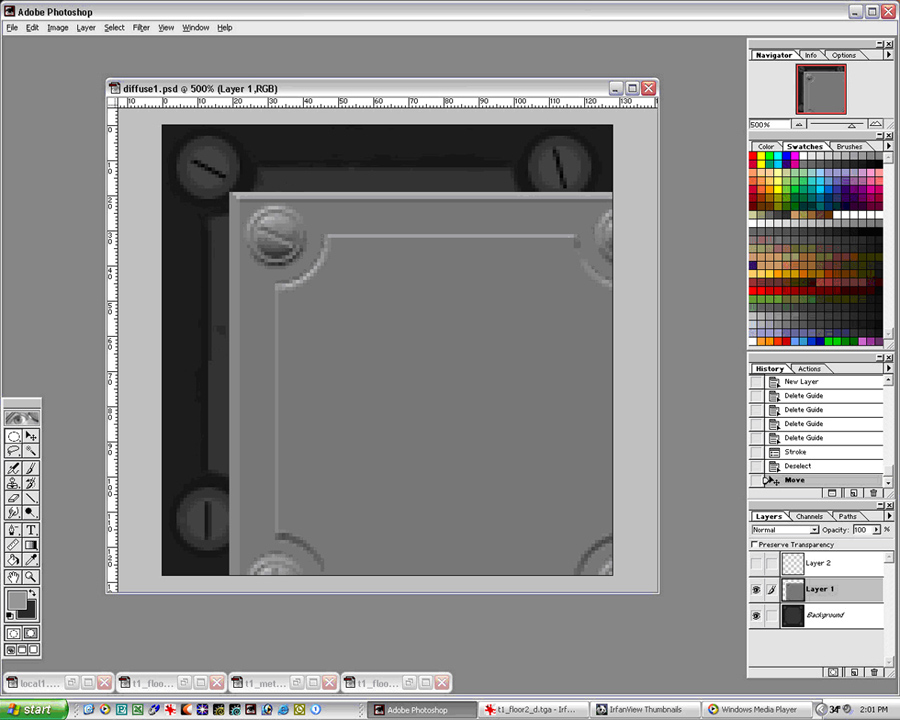
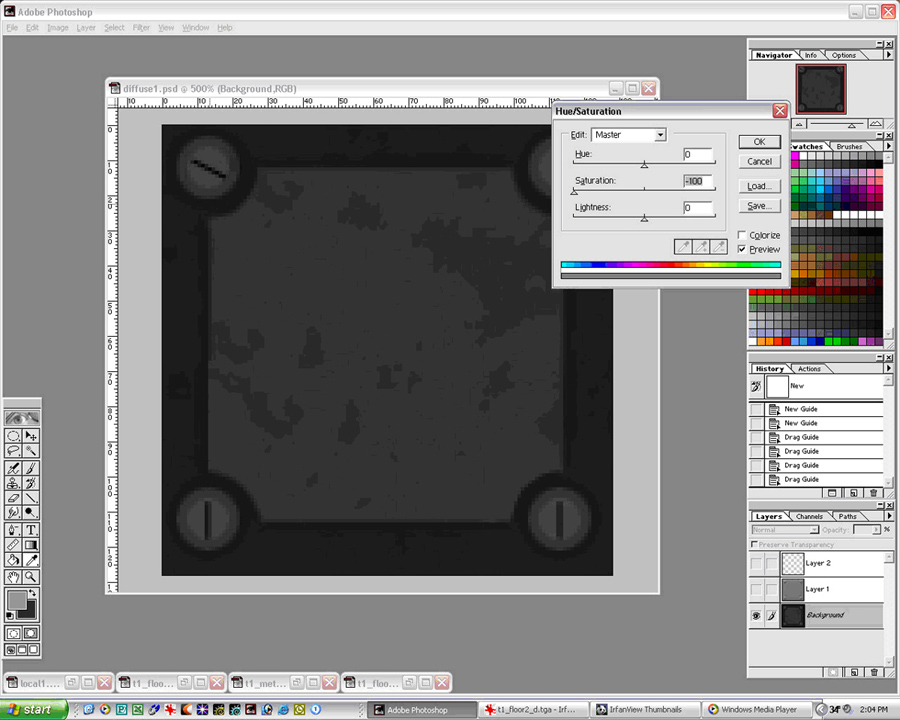
Step 2: Hide your local map layer and select the diffuse map layer and desaturate it as shown. You can also grayscale it and then return it back to an RGB image. Either way will work.
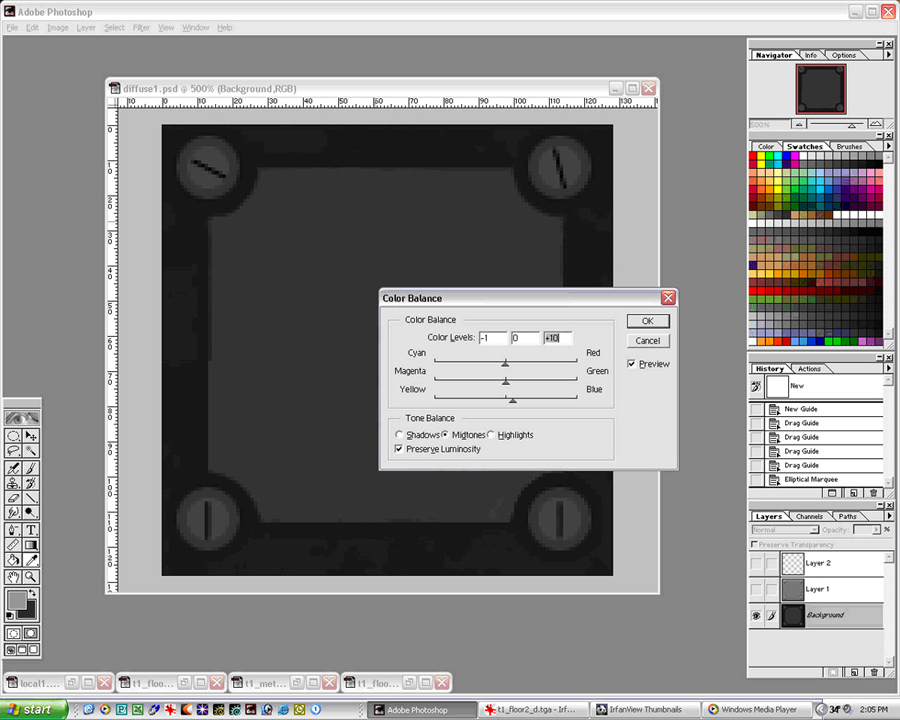
Step 3: Using Color Balance, adjust the color of your diffuse map to the color range you’d like the specular map. Inject the specular map with blue tones for areas that will be lit with cool colored lighting, or make it red toned for warm lit areas. Keep the color very desaturated since too intense a specular map color will change the overall color scheme of the original diffuse map too dramatically. Please be aware that you may also be going back into your specular map later on in the process to adjust the color tone.
Step 4: Go to the grayscaled/inverted local map layer and turn it back on to view it. Using the grayscaled/inverted local map as a template (which will be deleted later on) and on a new layer, use your selection tools to trace out the shapes that will edged, etc. Think of a car and how the seams in the sheet metal have a highlight from the sun, etc running along their edges. It’s the same idea here... you’ll be placing a highlight along the edges of bevels and seams to help roll the edges and highlight them when light hits them.
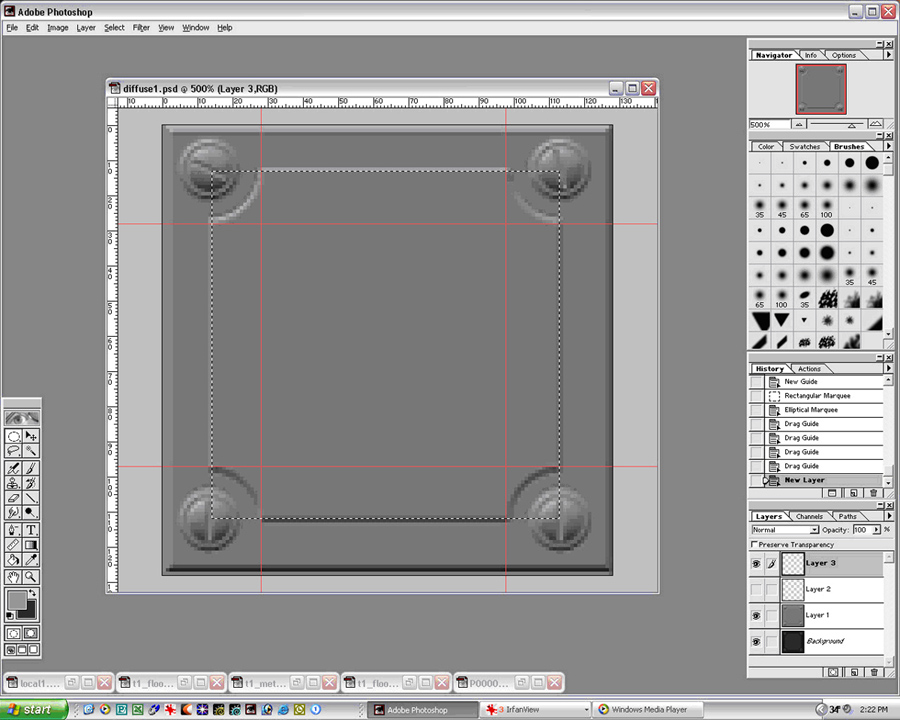
Step 5: In order to slice out the areas that are circular in your selection, use the guidelines and line them up to where you wish the selection to follow. Using the Elliptical Marquee Tool and holding down Alt, place the cursor onto the crosshair of the guidelines on one of the corners and pull out to follow the contour of the curve to delete the shape from the original box selection.
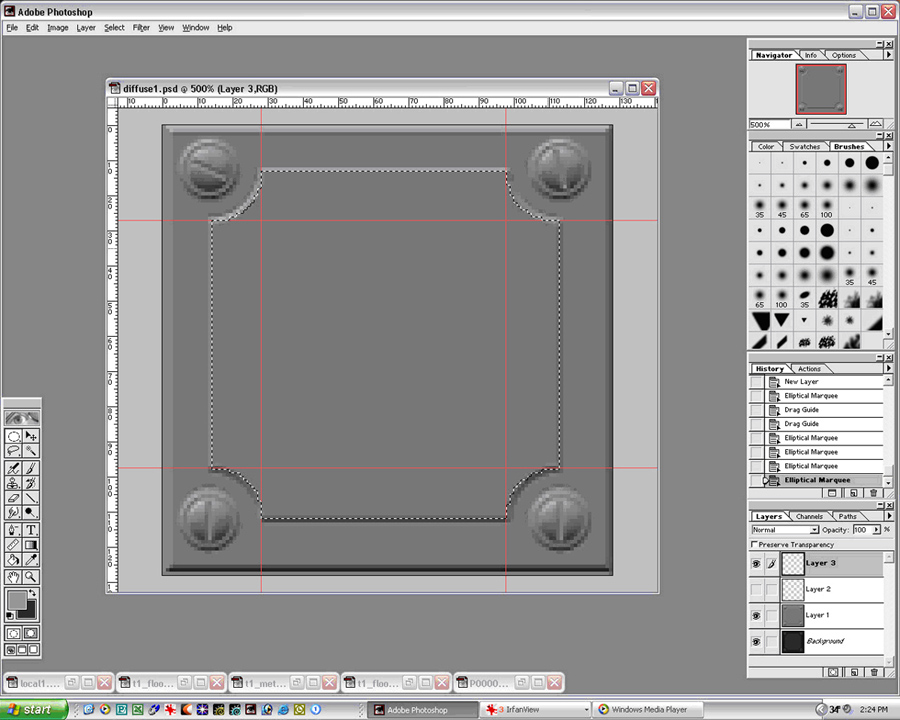
Step 6: With your selection completed, turn off the grayscaled/inverted layer so it can’t be seen and then return to your top layer…
Click on Edit and select Stroke.
In the Stroke window, set the stroke width to 1 (or whatever width is needed). 1 seems to work best for edging.
Set the Location to Center.
Leave Opacity to 100%.
Hit OK.
Click on the layer to turn off the selection and your stroked edging is left behind on your layer. Now it needs to be slightly blurred.
Click on Filter.
Click on Blur.
Click on Gaussian Blur.
Set the blur to 0.03 or 0.04. No more than that!
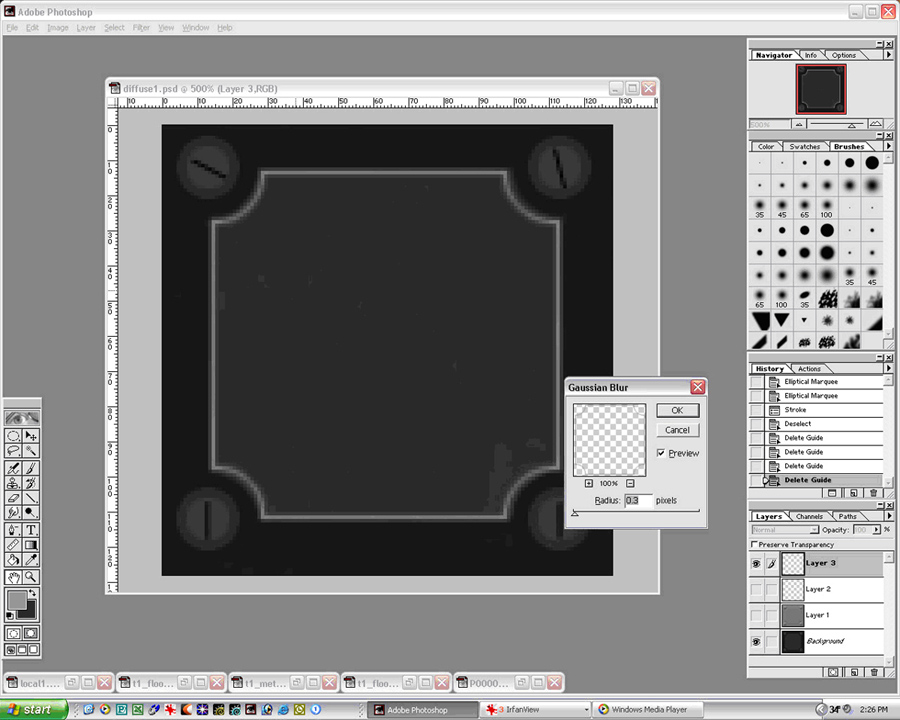
Step 7: After blurring the edging, decrease the opacity of the layer by 30 to 40%.
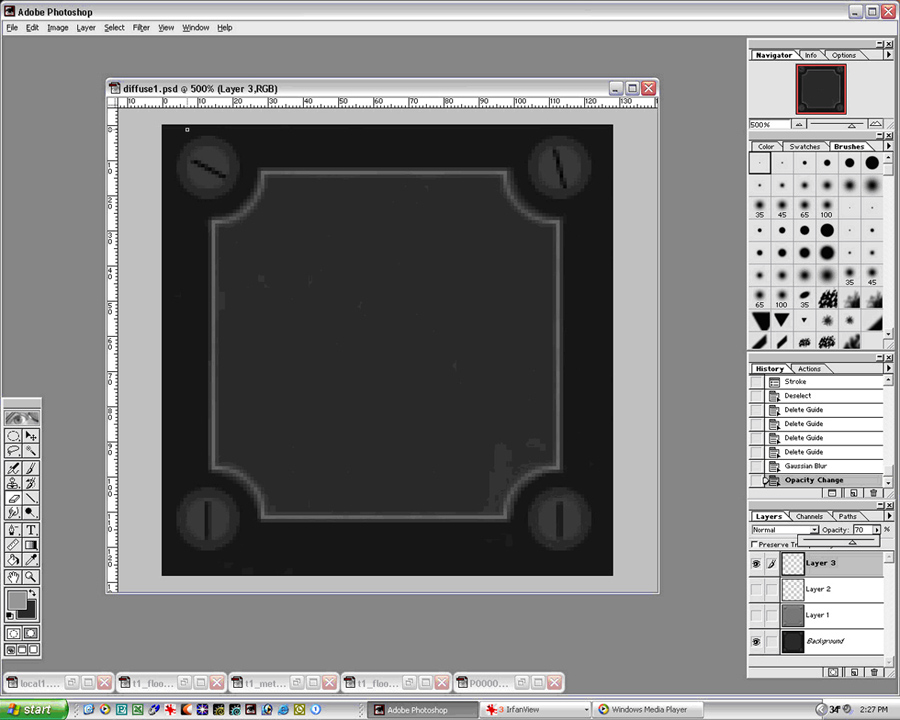
Step 8: Set your brush to its smallest setting and turn on your eraser. Using the smallest brush, erase back and forth over the edging line to break it up so it has more realism and isn’t so clean.
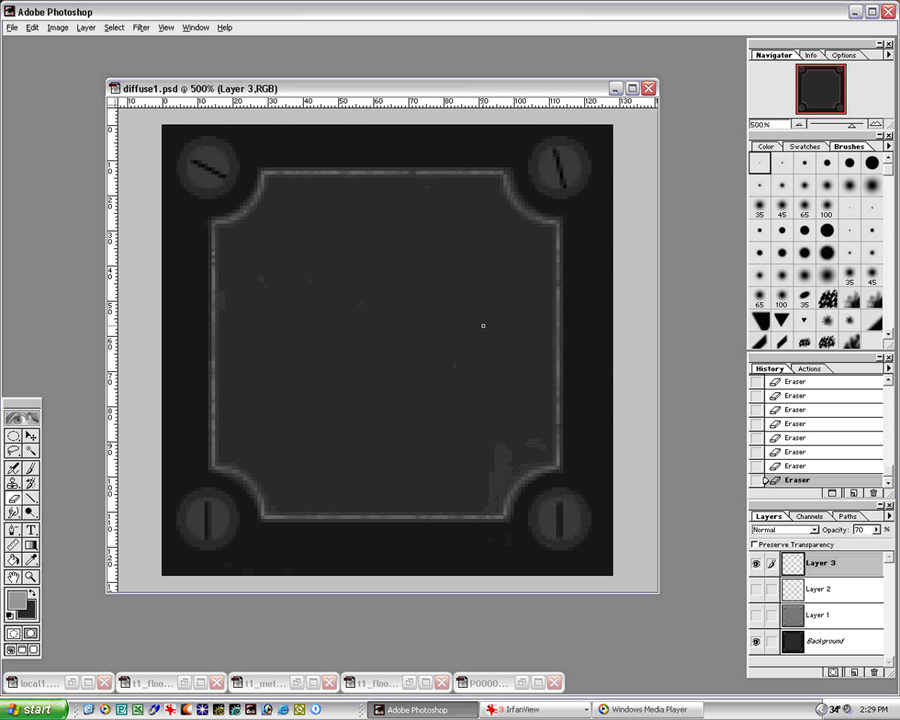
Step 9: Adjust the opacity of the layer yet again and selecting a larger brush size using the Dodge Tool to highlight corners, etc on the edging.
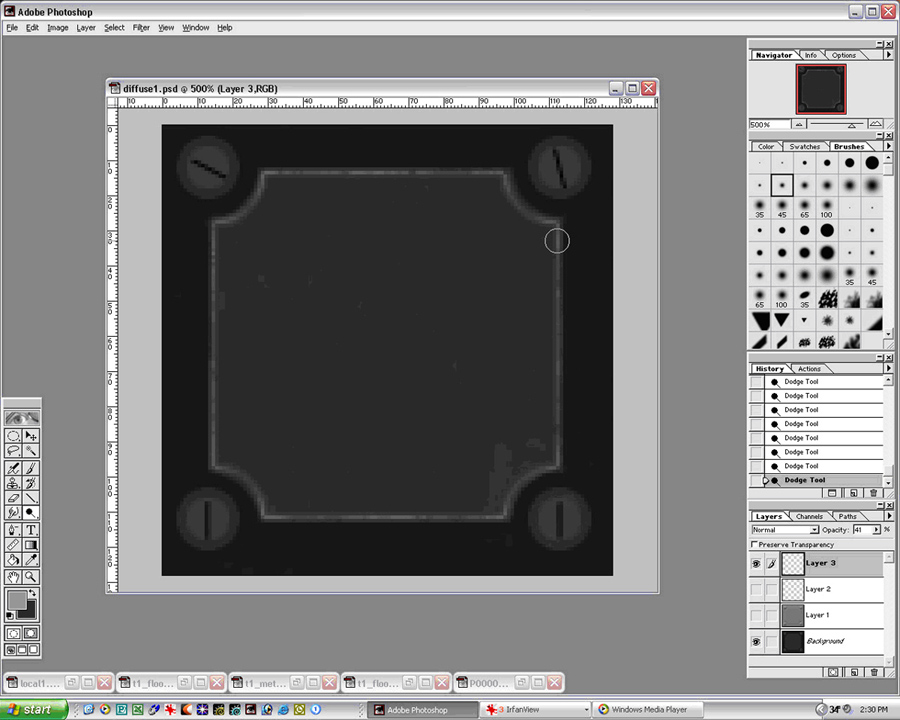
Step 10: Do the same with the rest of the edging on your texture and follow the steps above...

Step 11: Find a suitable metal source fil to use as a specular surface.
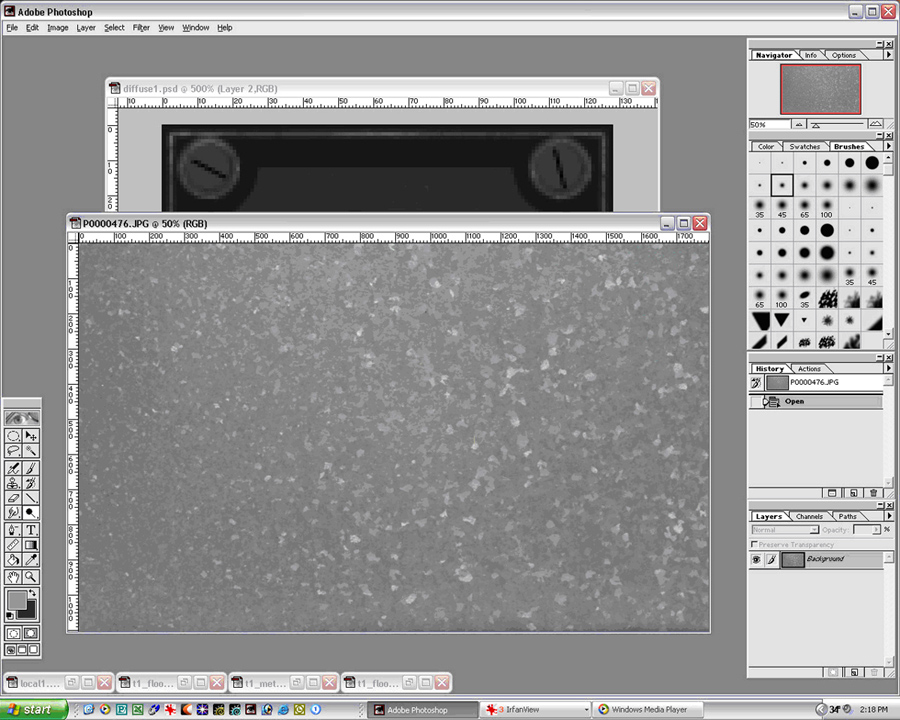
Step 12: Cut out a section of your selected metal and size to fit somewhat to your selected area on the texture.
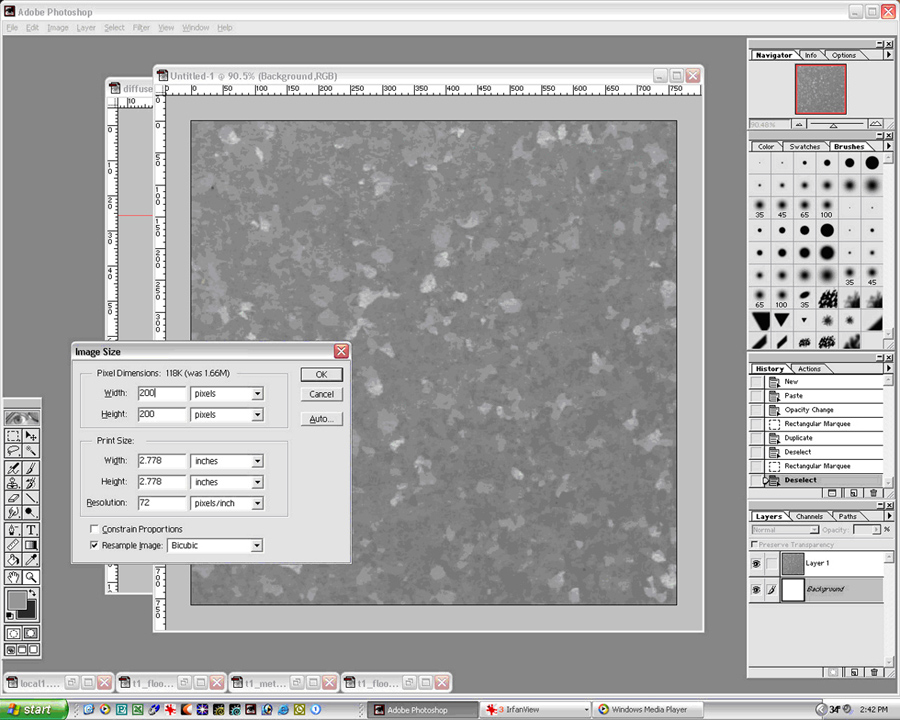
Step 13: Using the selection tool follow the contour of the shape you want the metal on and slide it over onto the resized metal image. Cut and copy the selected shape…
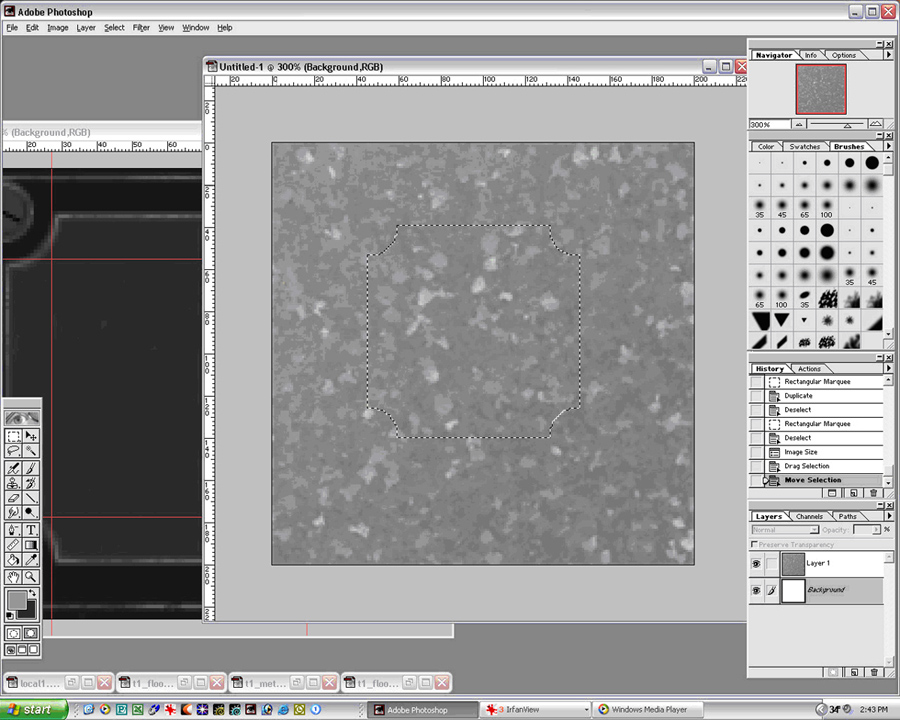
Step 14: Copy and paste the selected piece into a new layer on your texture.
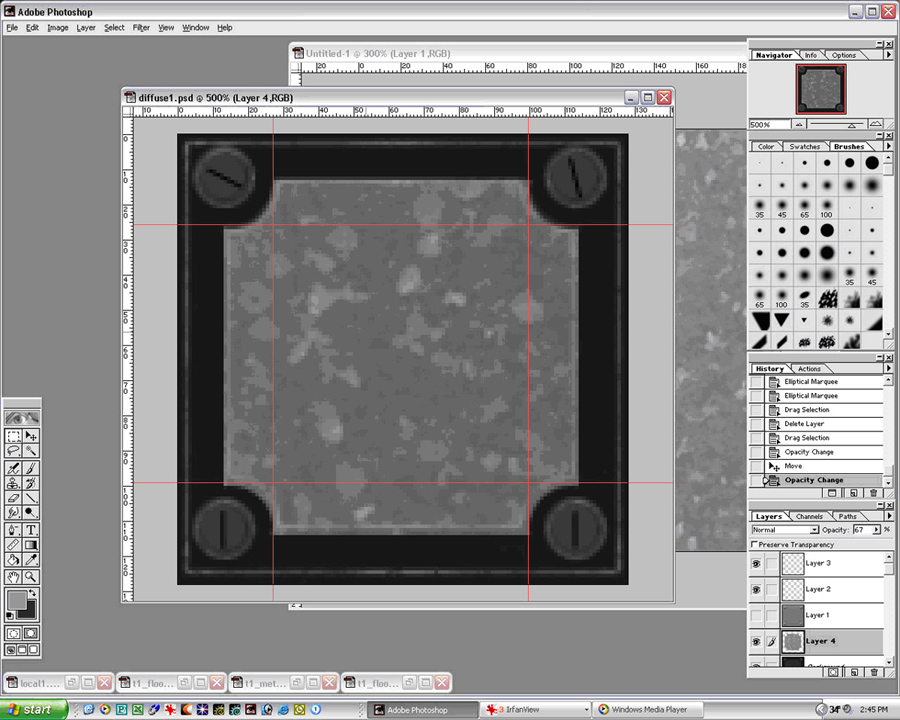
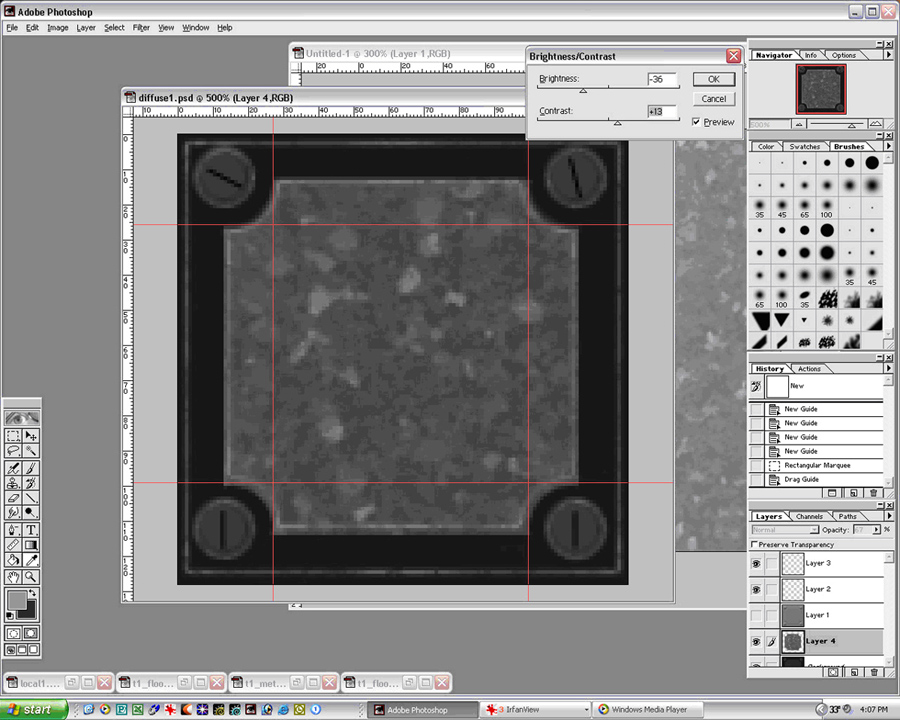
Step 15: Adjust the brightness and contrast of the layer
Step 16: Adjust the opacity of the layer
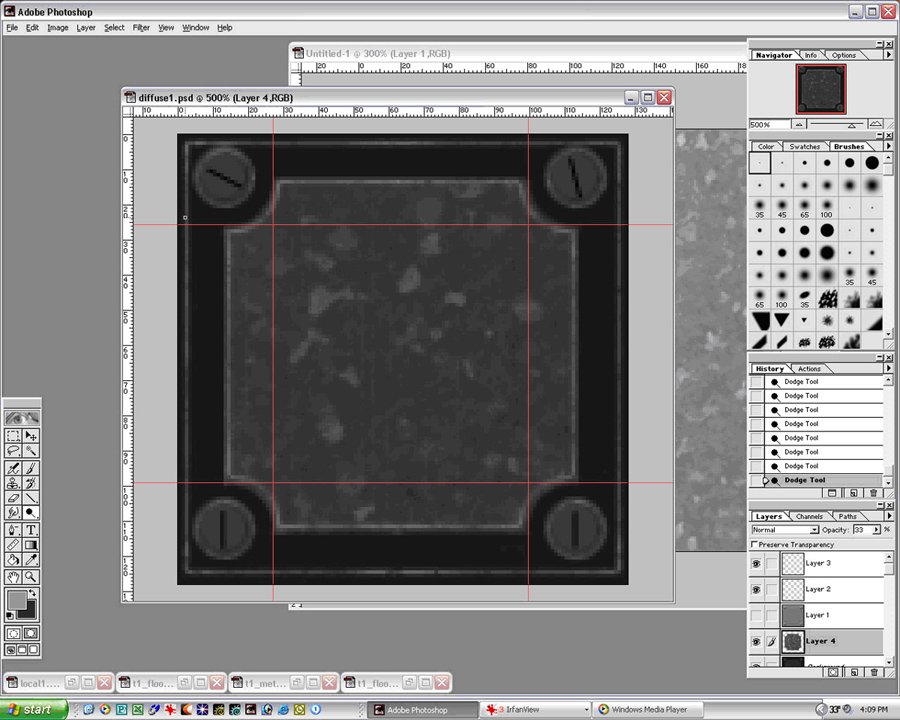
Step 17: Using the Dodge Tool add a slight highlight to the metal. Then on a separate layer and setting your airbrush to Dissolve, spray a small amount of stipples on the layer above the metal layer.

Step 18: Using Gaussian Blur, blur the stipples 0.03 to 0.04%…
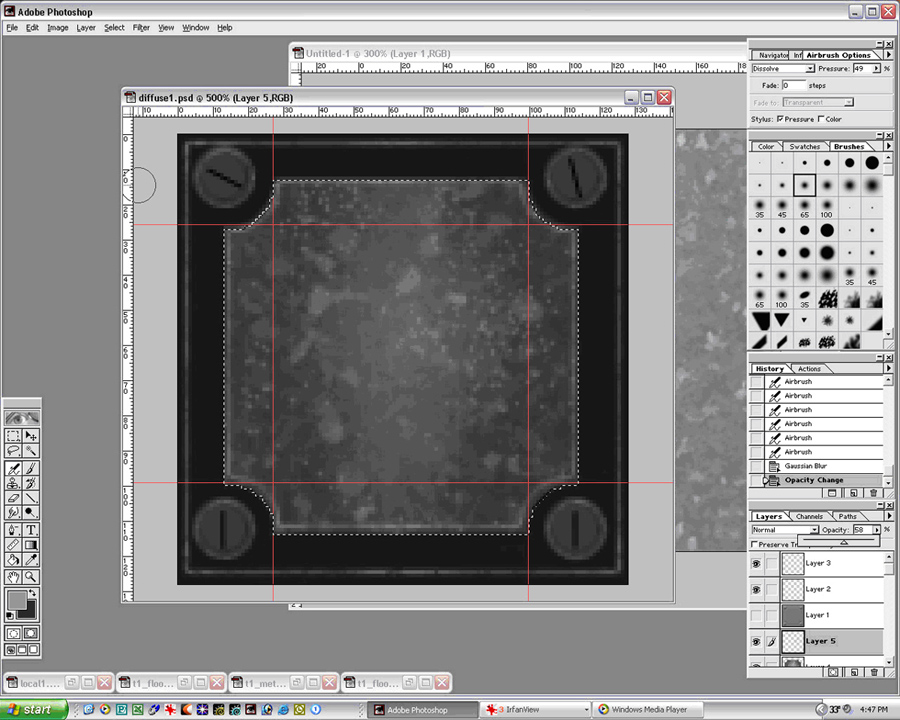
Step 19: I add highlights to the screws, etc…
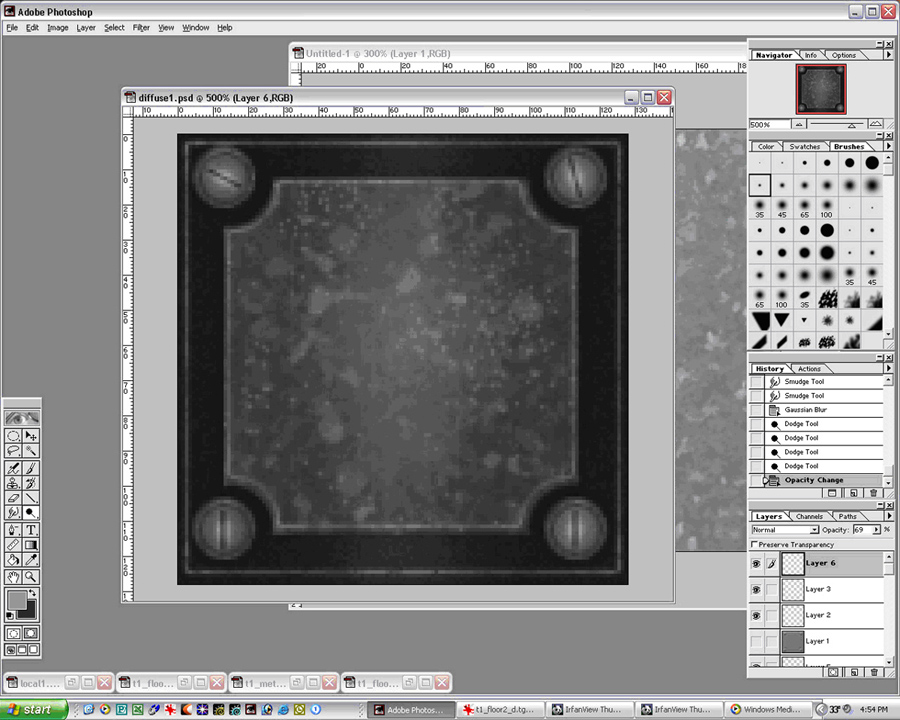
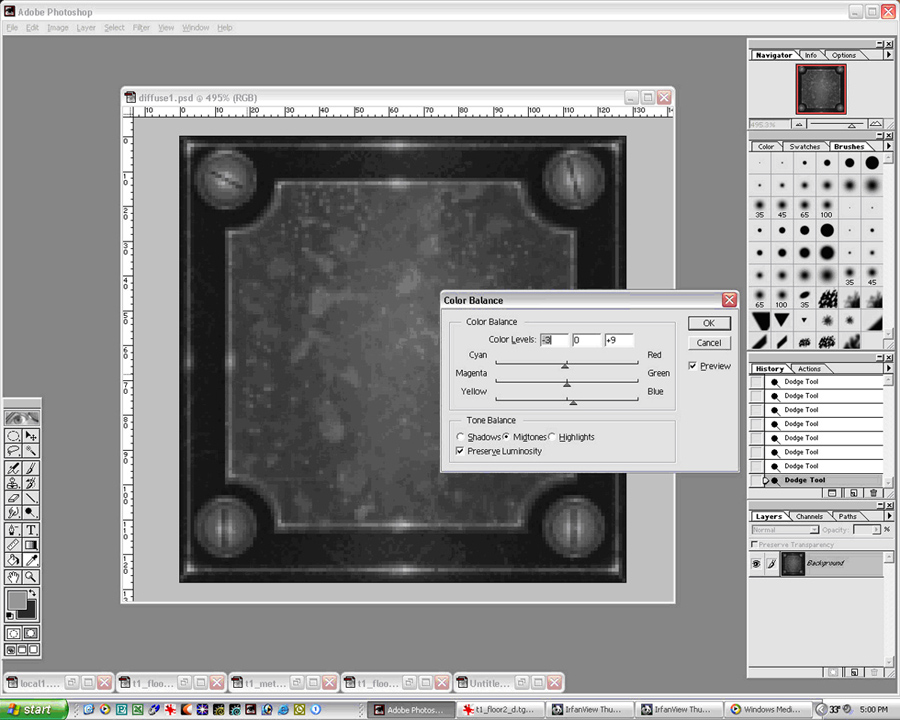
Step 20: Delete the grayscaled/inverted local map layer, dodge edging layers to desired amounts, flatten remaining layers, and then using the Dodge Tool add little burn highlights on corners, etc.
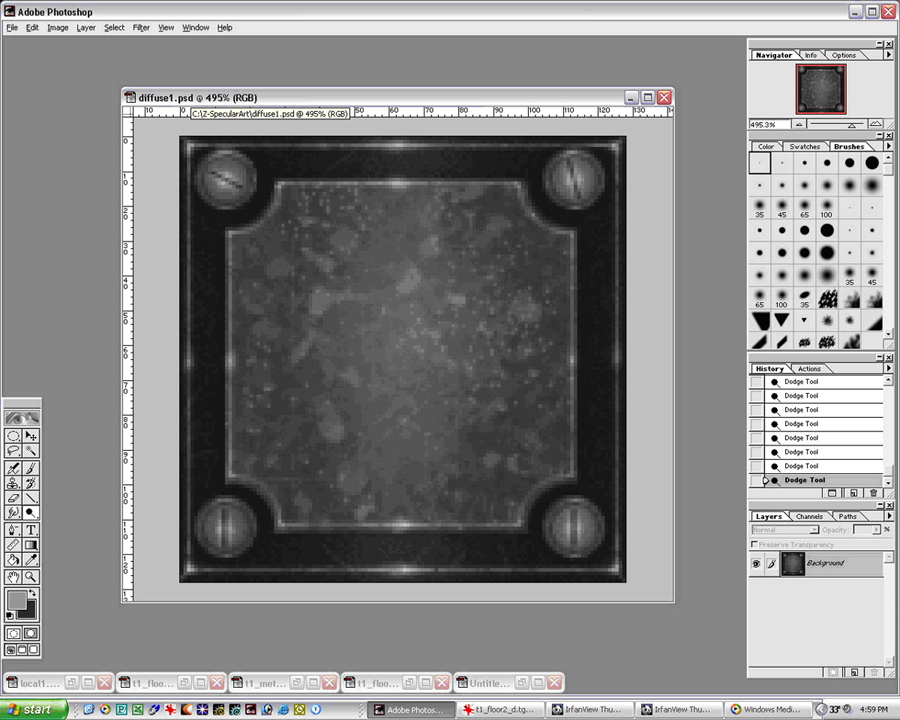
Step 21: Adjust overall color and saturation of the specular map and save. Remember that too saturated a specular map will overpower the diffuse map colors. Make sure you delete your normal map template and remember that an inverted normal map is not to be used as a specular map…
